Monetization and Login
Configure ads, in-app purchases, and Facebook login for apps streamed via Nothing2Install.
Ads
N2I converts native Android ad calls into H5 ads, so your existing in-game ad logic works without changes. Interstitials, rewarded ads, banners, and other formats are supported through a plugin that N2I integrates into your APK.
Supported mediation platforms: AppLovin/LevelPlay, Google Ad Mediation. Adding support for a new platform takes approximately one day.
Supported H5 ad networks: GoogleH5 and all major H5 game portal ad systems are supported out of the box.
For setup instructions and SDK integration details, see the N2I Ads Bridge documentation.
In-App Purchases
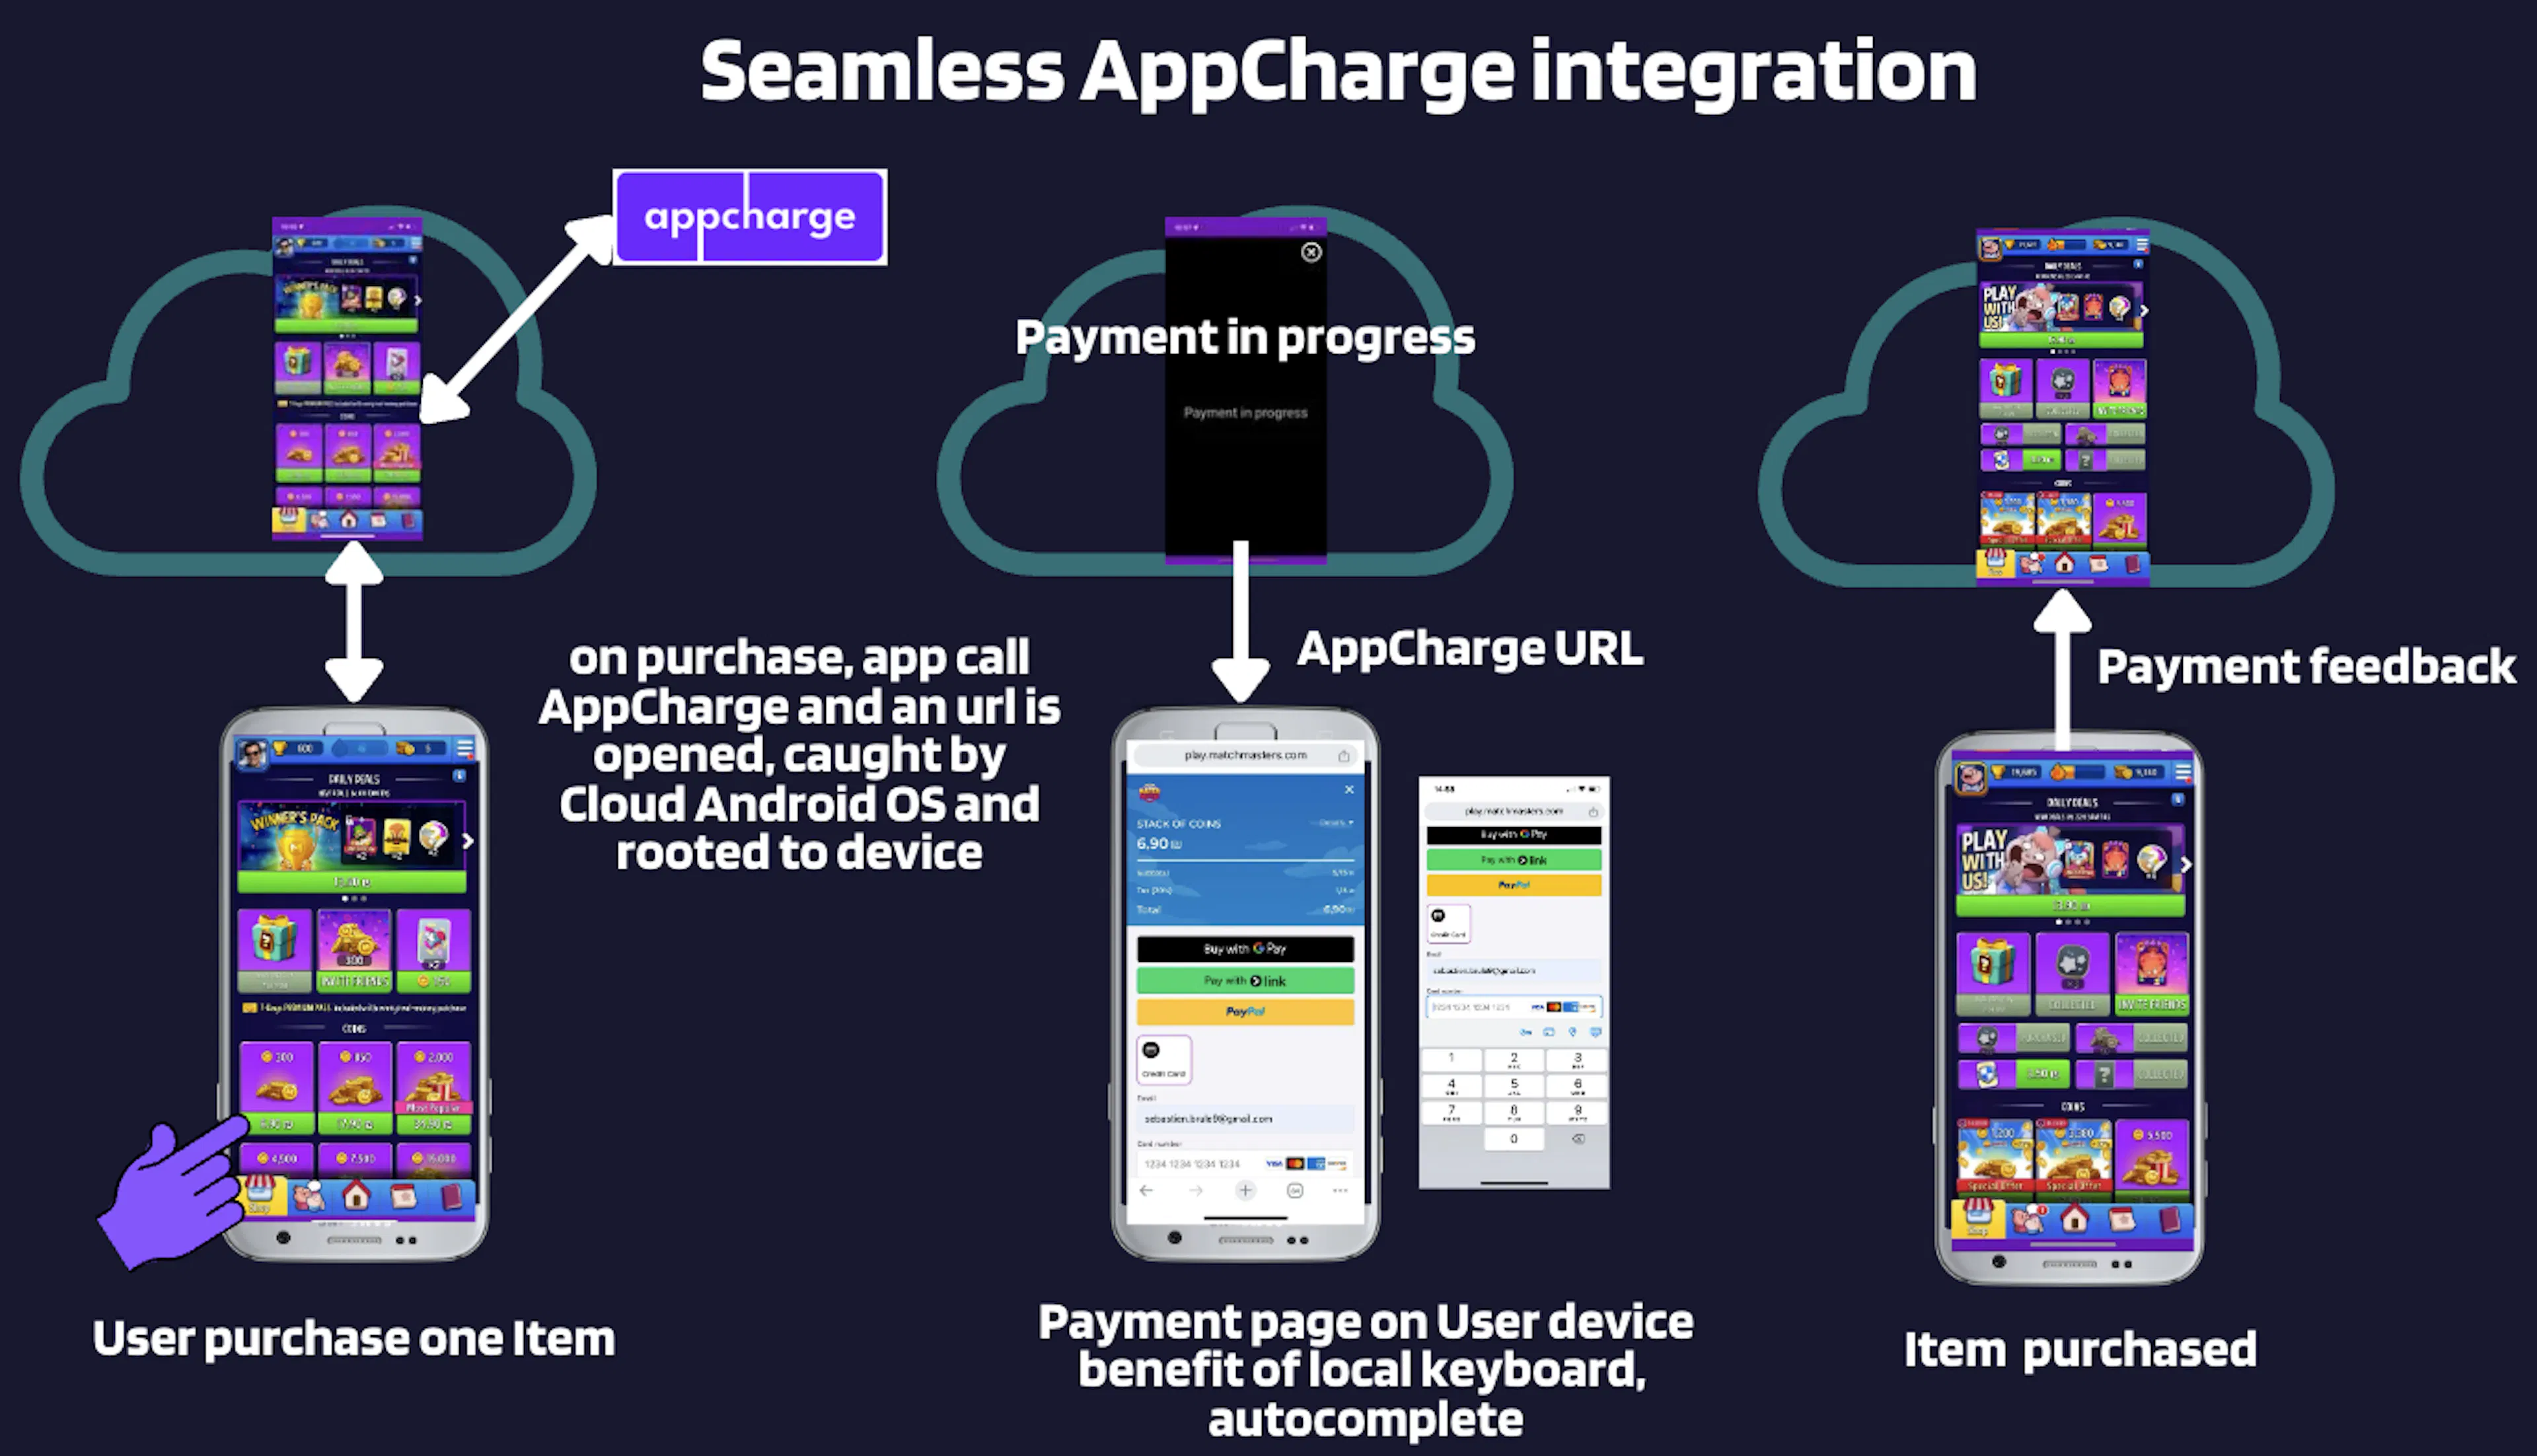
Because N2I streams apps without Google Play Services, IAP flows require an alternative payment provider. N2I routes the payment WebView from the cloud to the user's local browser, so the checkout experience runs natively on the user's device.
AppCharge (natively supported)
AppCharge is the recommended IAP solution and is natively integrated with N2I. The AppCharge Unity SDK works as-is: when a purchase flow opens a WebView, N2I automatically routes it to the end user's local browser. Purchase confirmation is sent back to the streamed app via the custom packet channel.
Other payment providers
The same routing mechanism works with any WebView-based payment provider:
- Xsolla
- H5 portal payments (Crazygames, Gamedistribution, Poki, Yandex)
- Your own payment solution
If your payment provider operates entirely natively (no WebView), no changes to the game are required.
Facebook Login
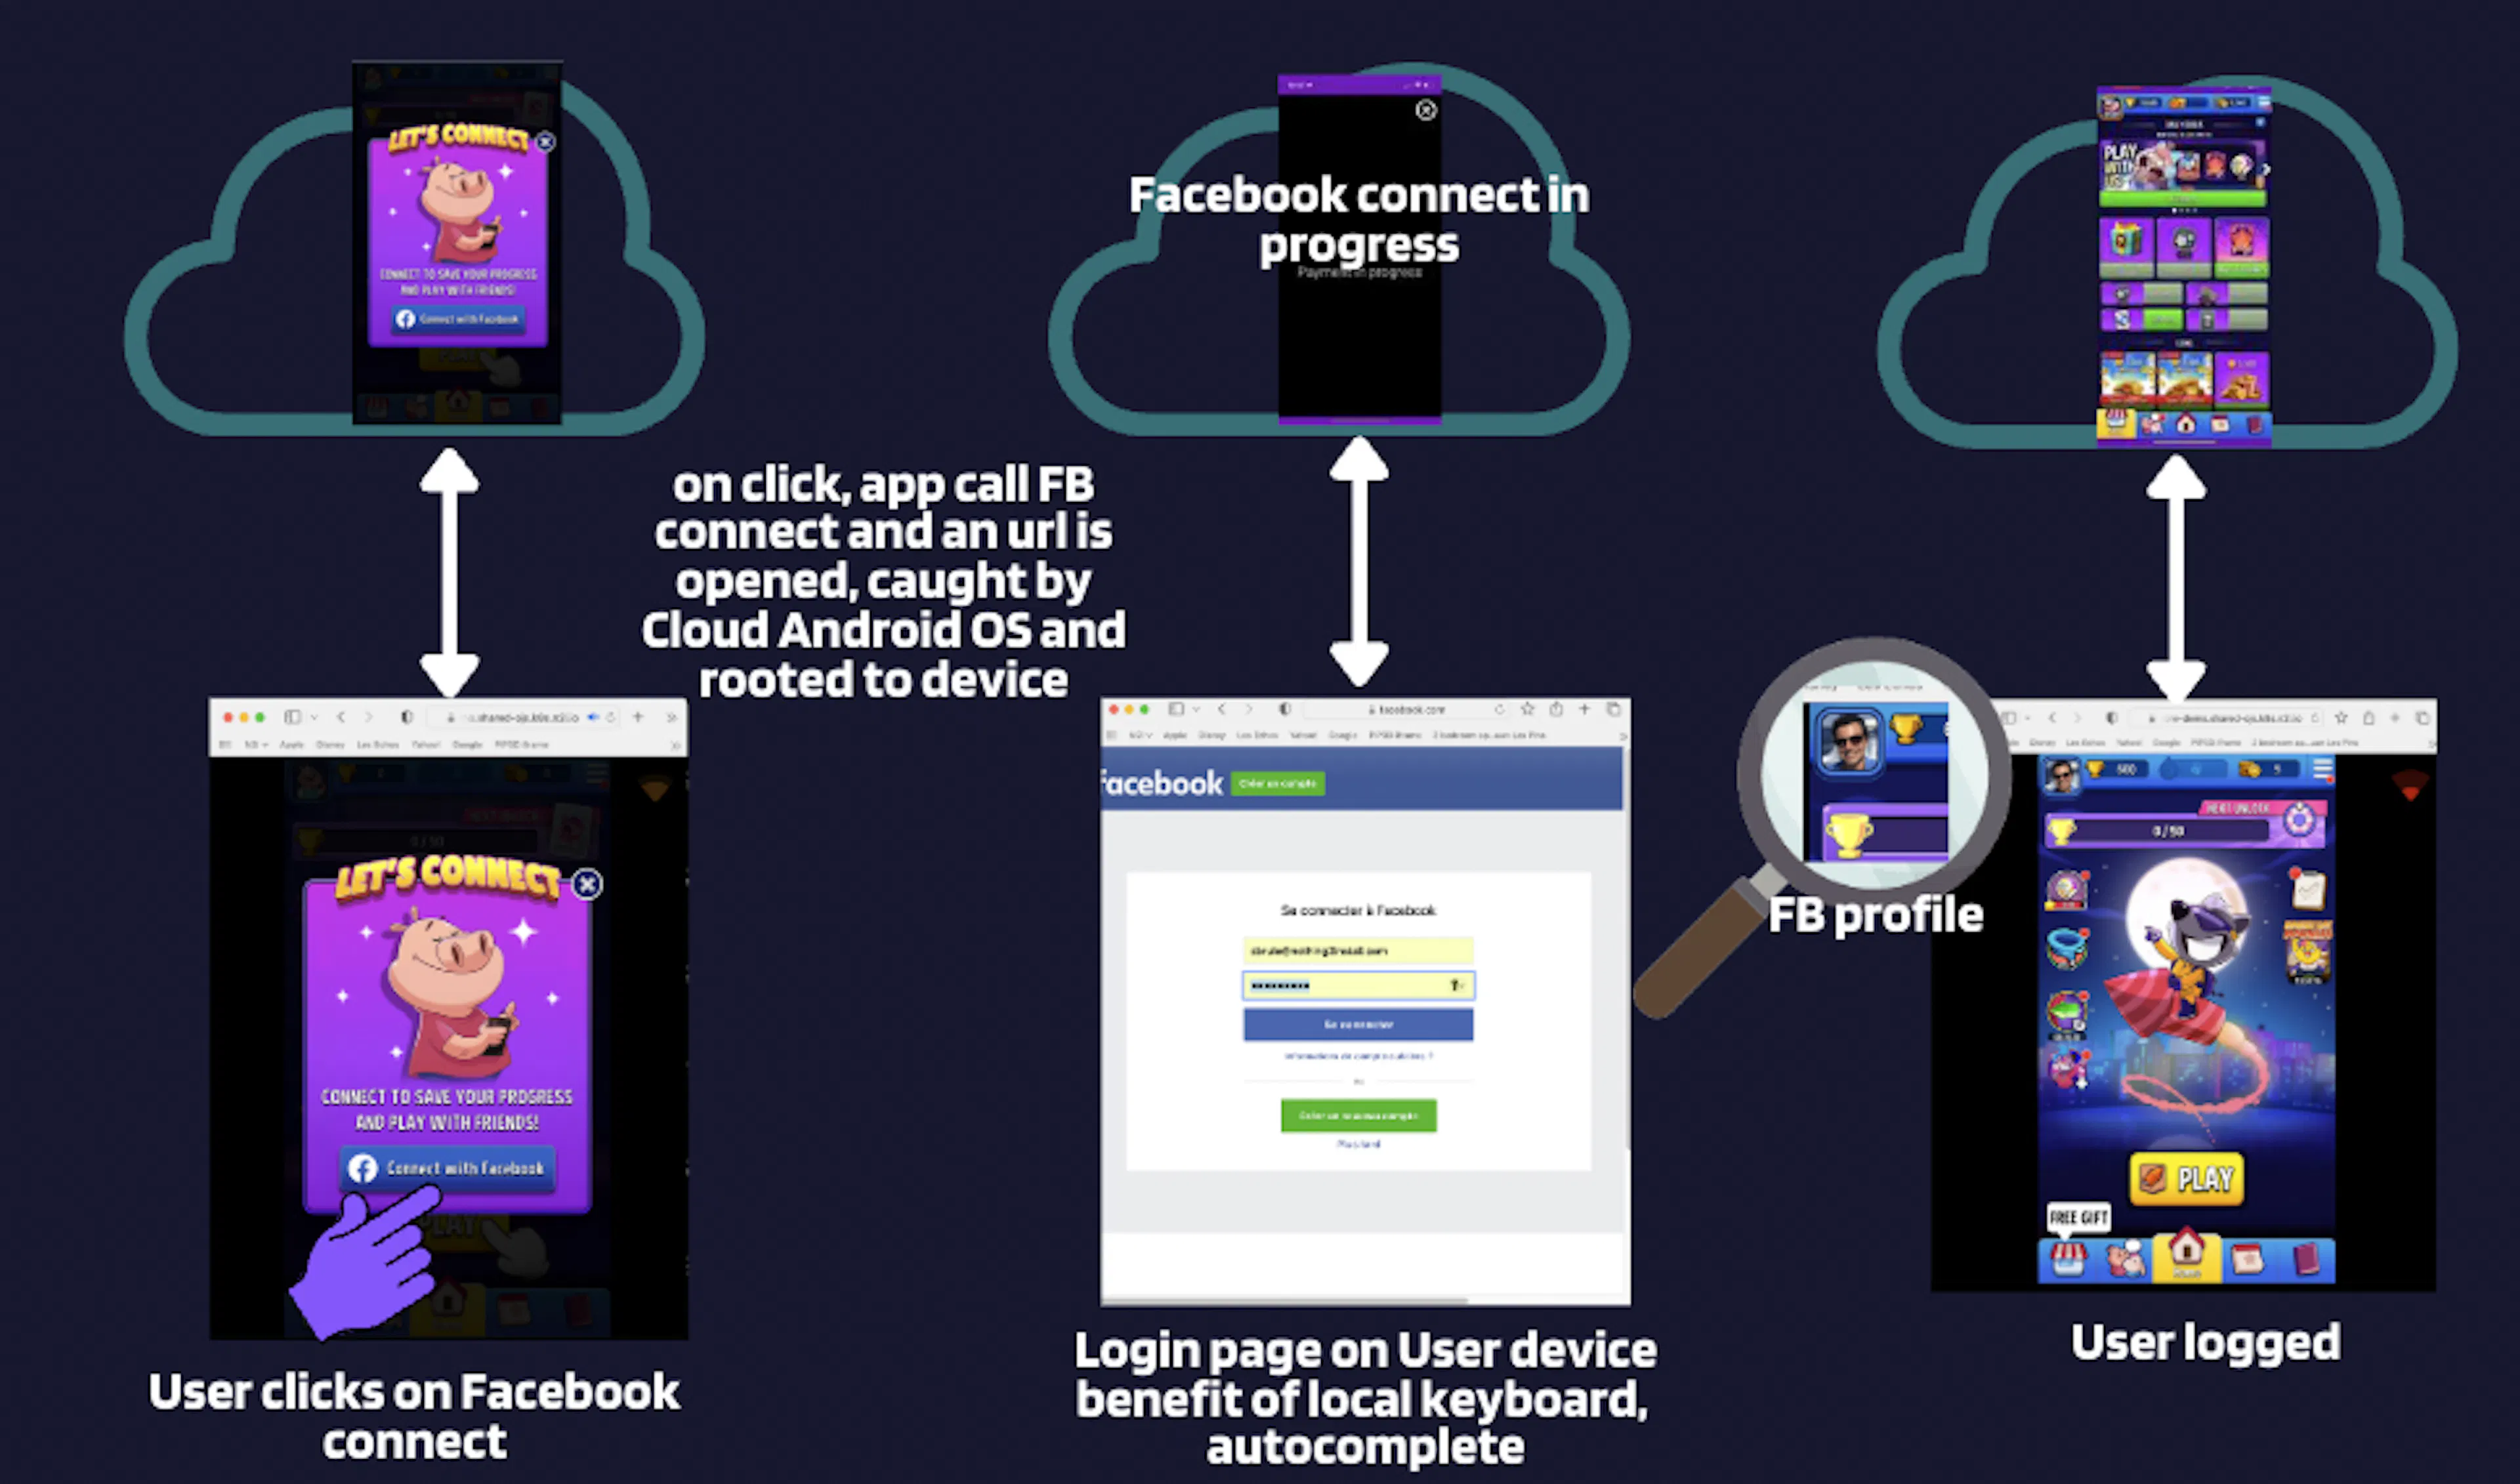
N2I routes the Facebook OAuth flow to the user's local browser, so users can authenticate using saved credentials or the browser's autocomplete. From the user's perspective, login works exactly as it would in a native app.
Setup
N2I will provide you with an OAuth redirect URL. You must add this URL to your Facebook app before enabling the feature.
-
Open https://developers.facebook.com/apps/ and select your app.
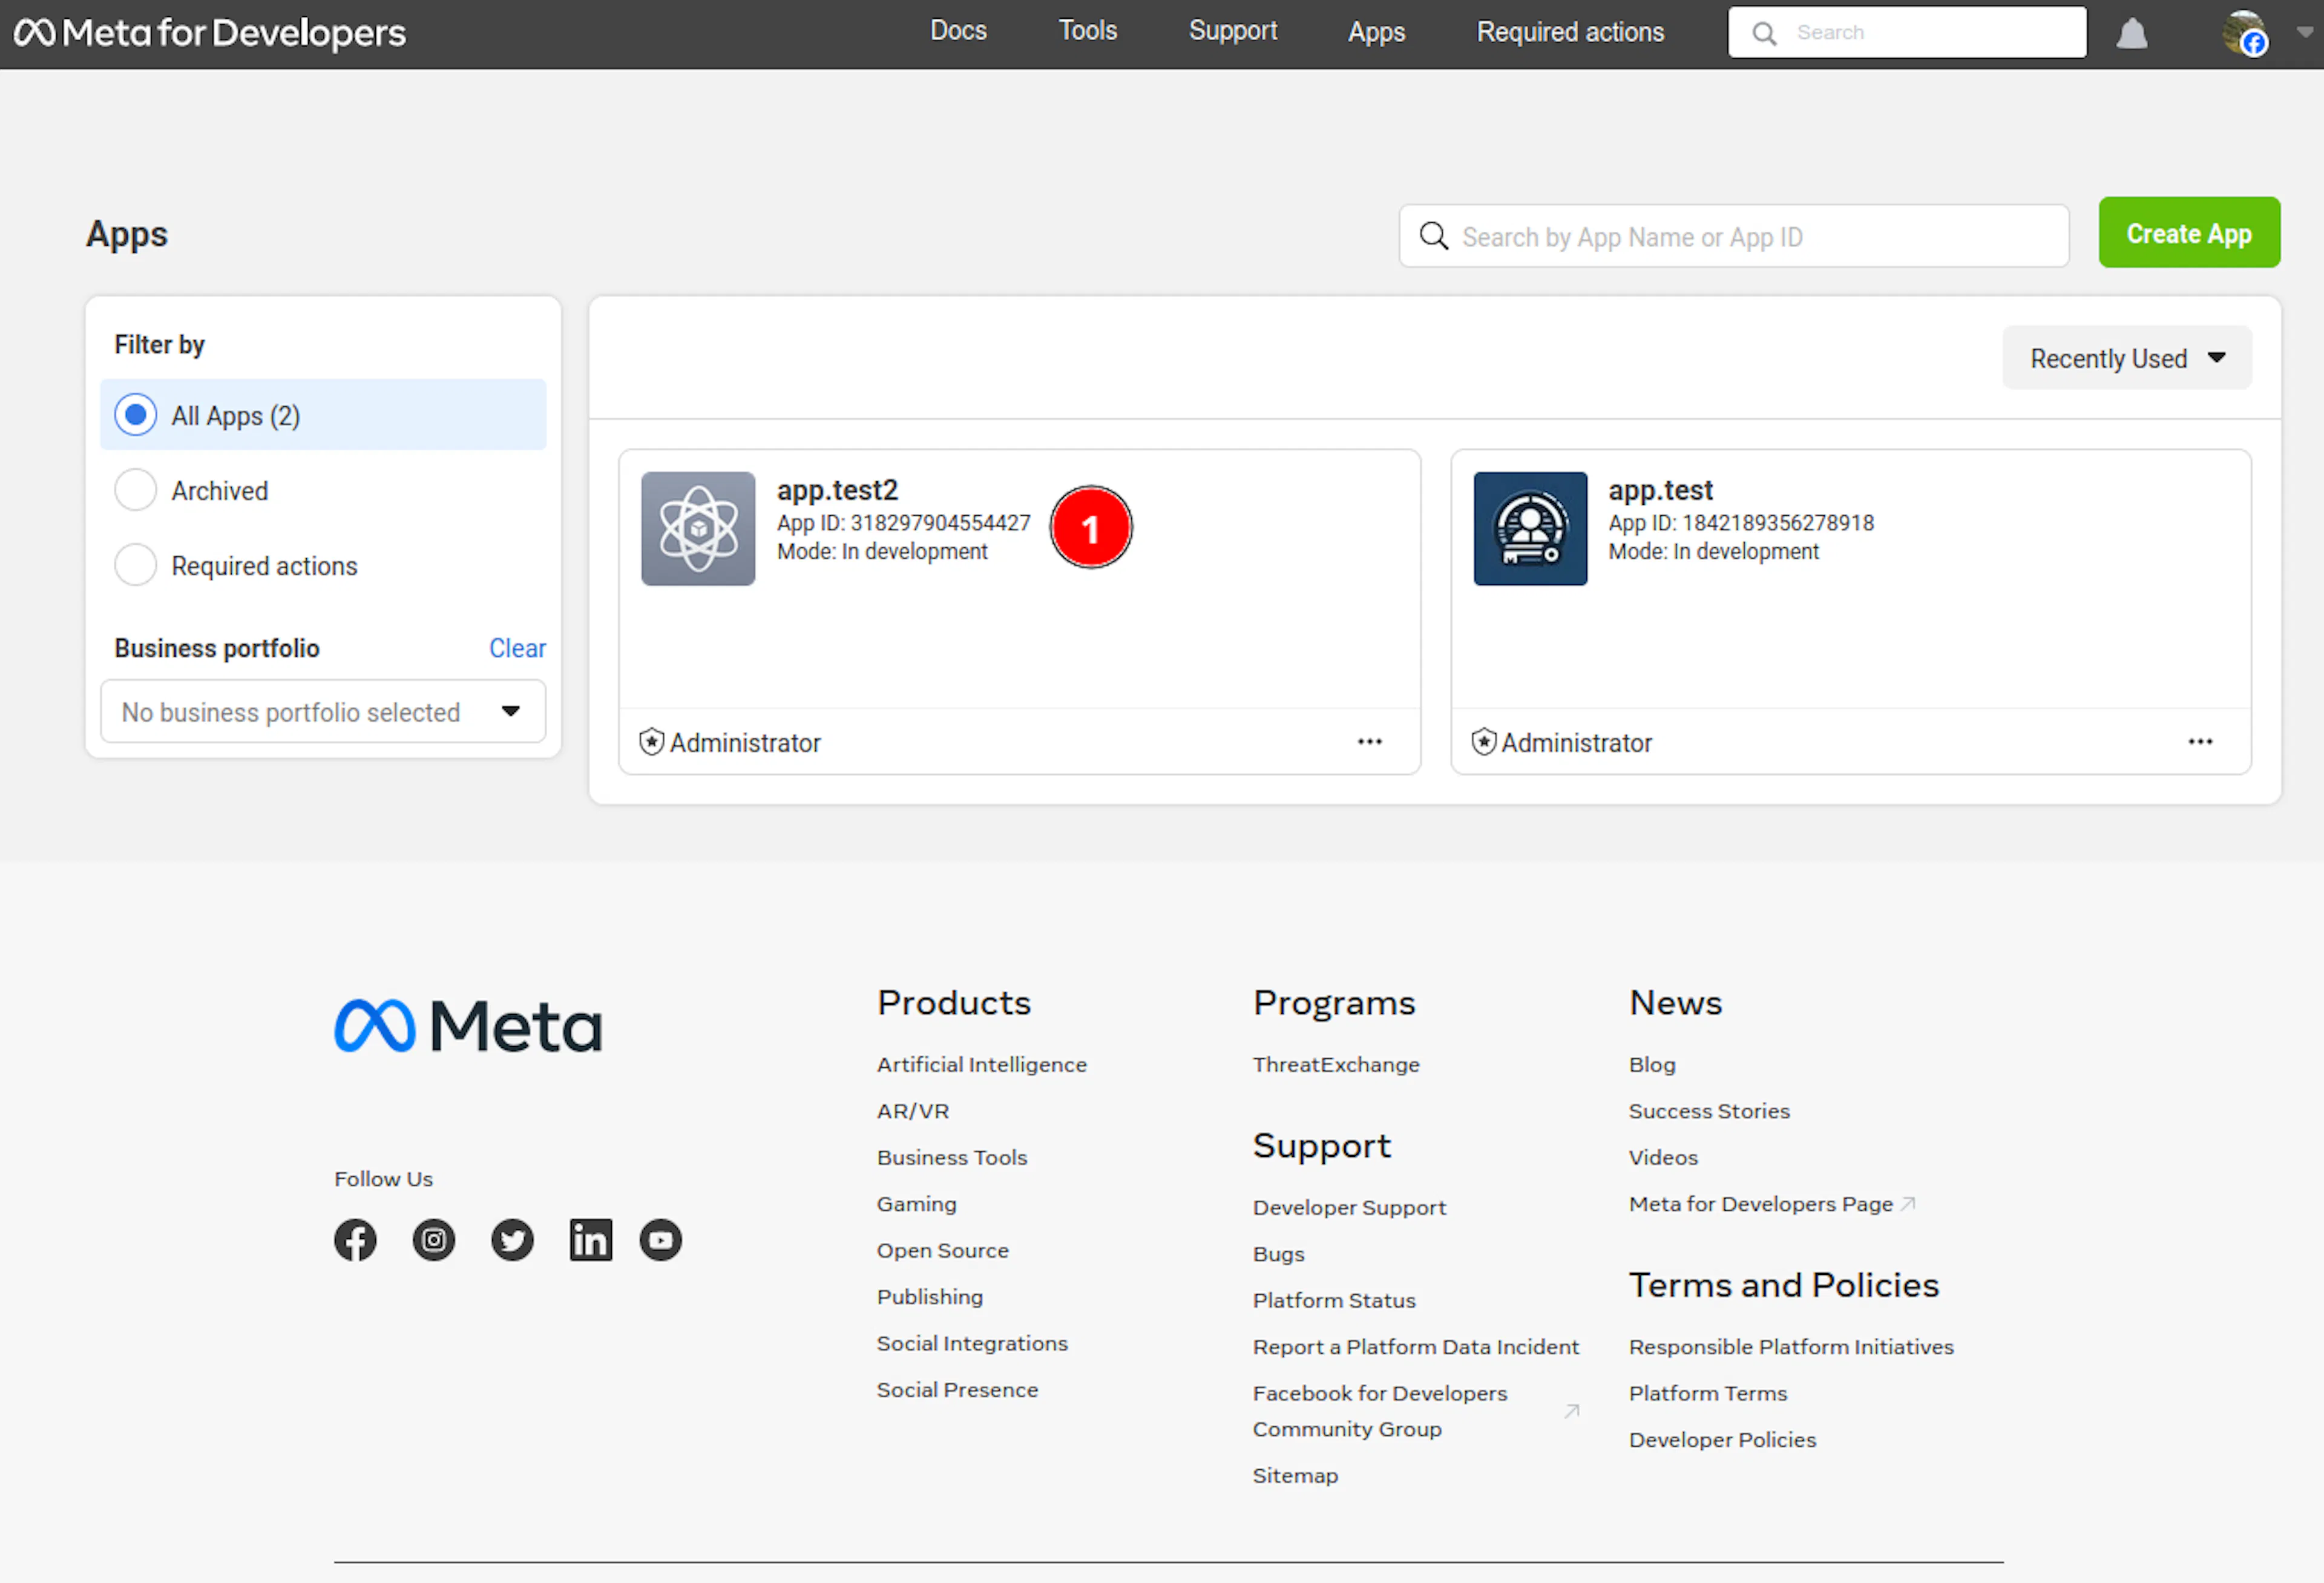
Facebook developers dashboard — app selection -
Click Use cases in the left sidebar.
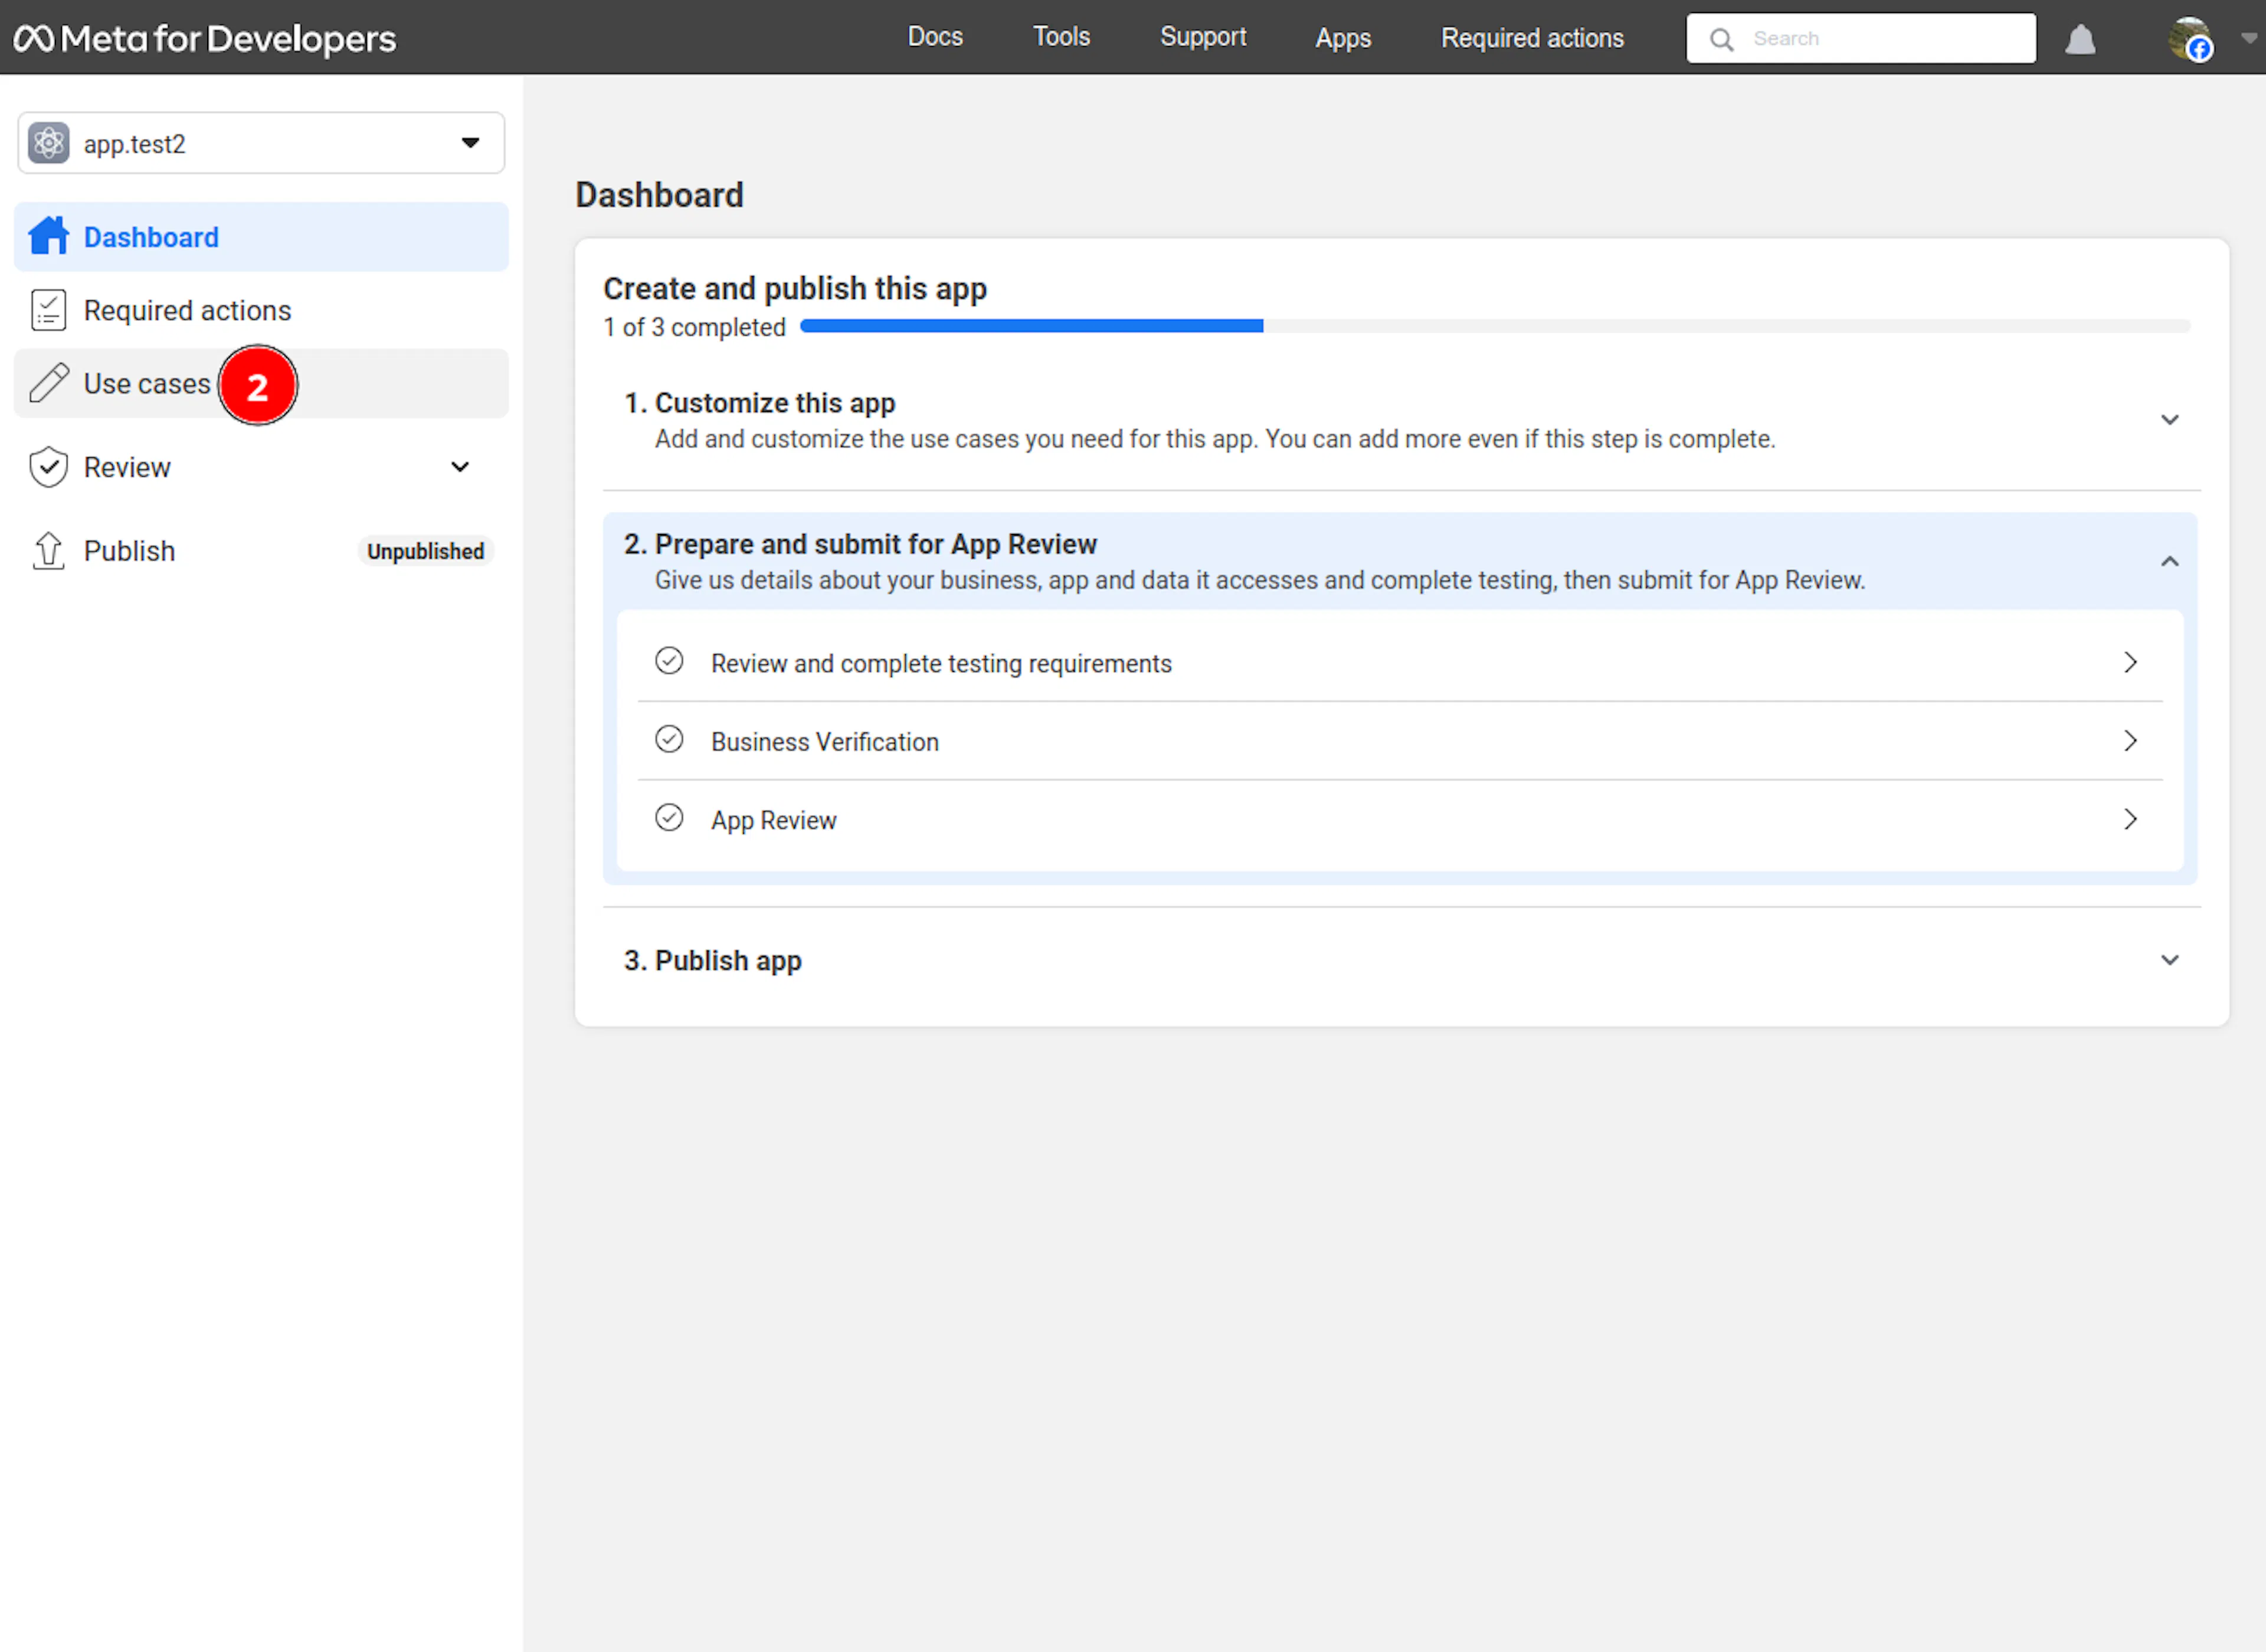
Use cases section in Facebook developers dashboard -
Find the Facebook Login use case and click Customize.
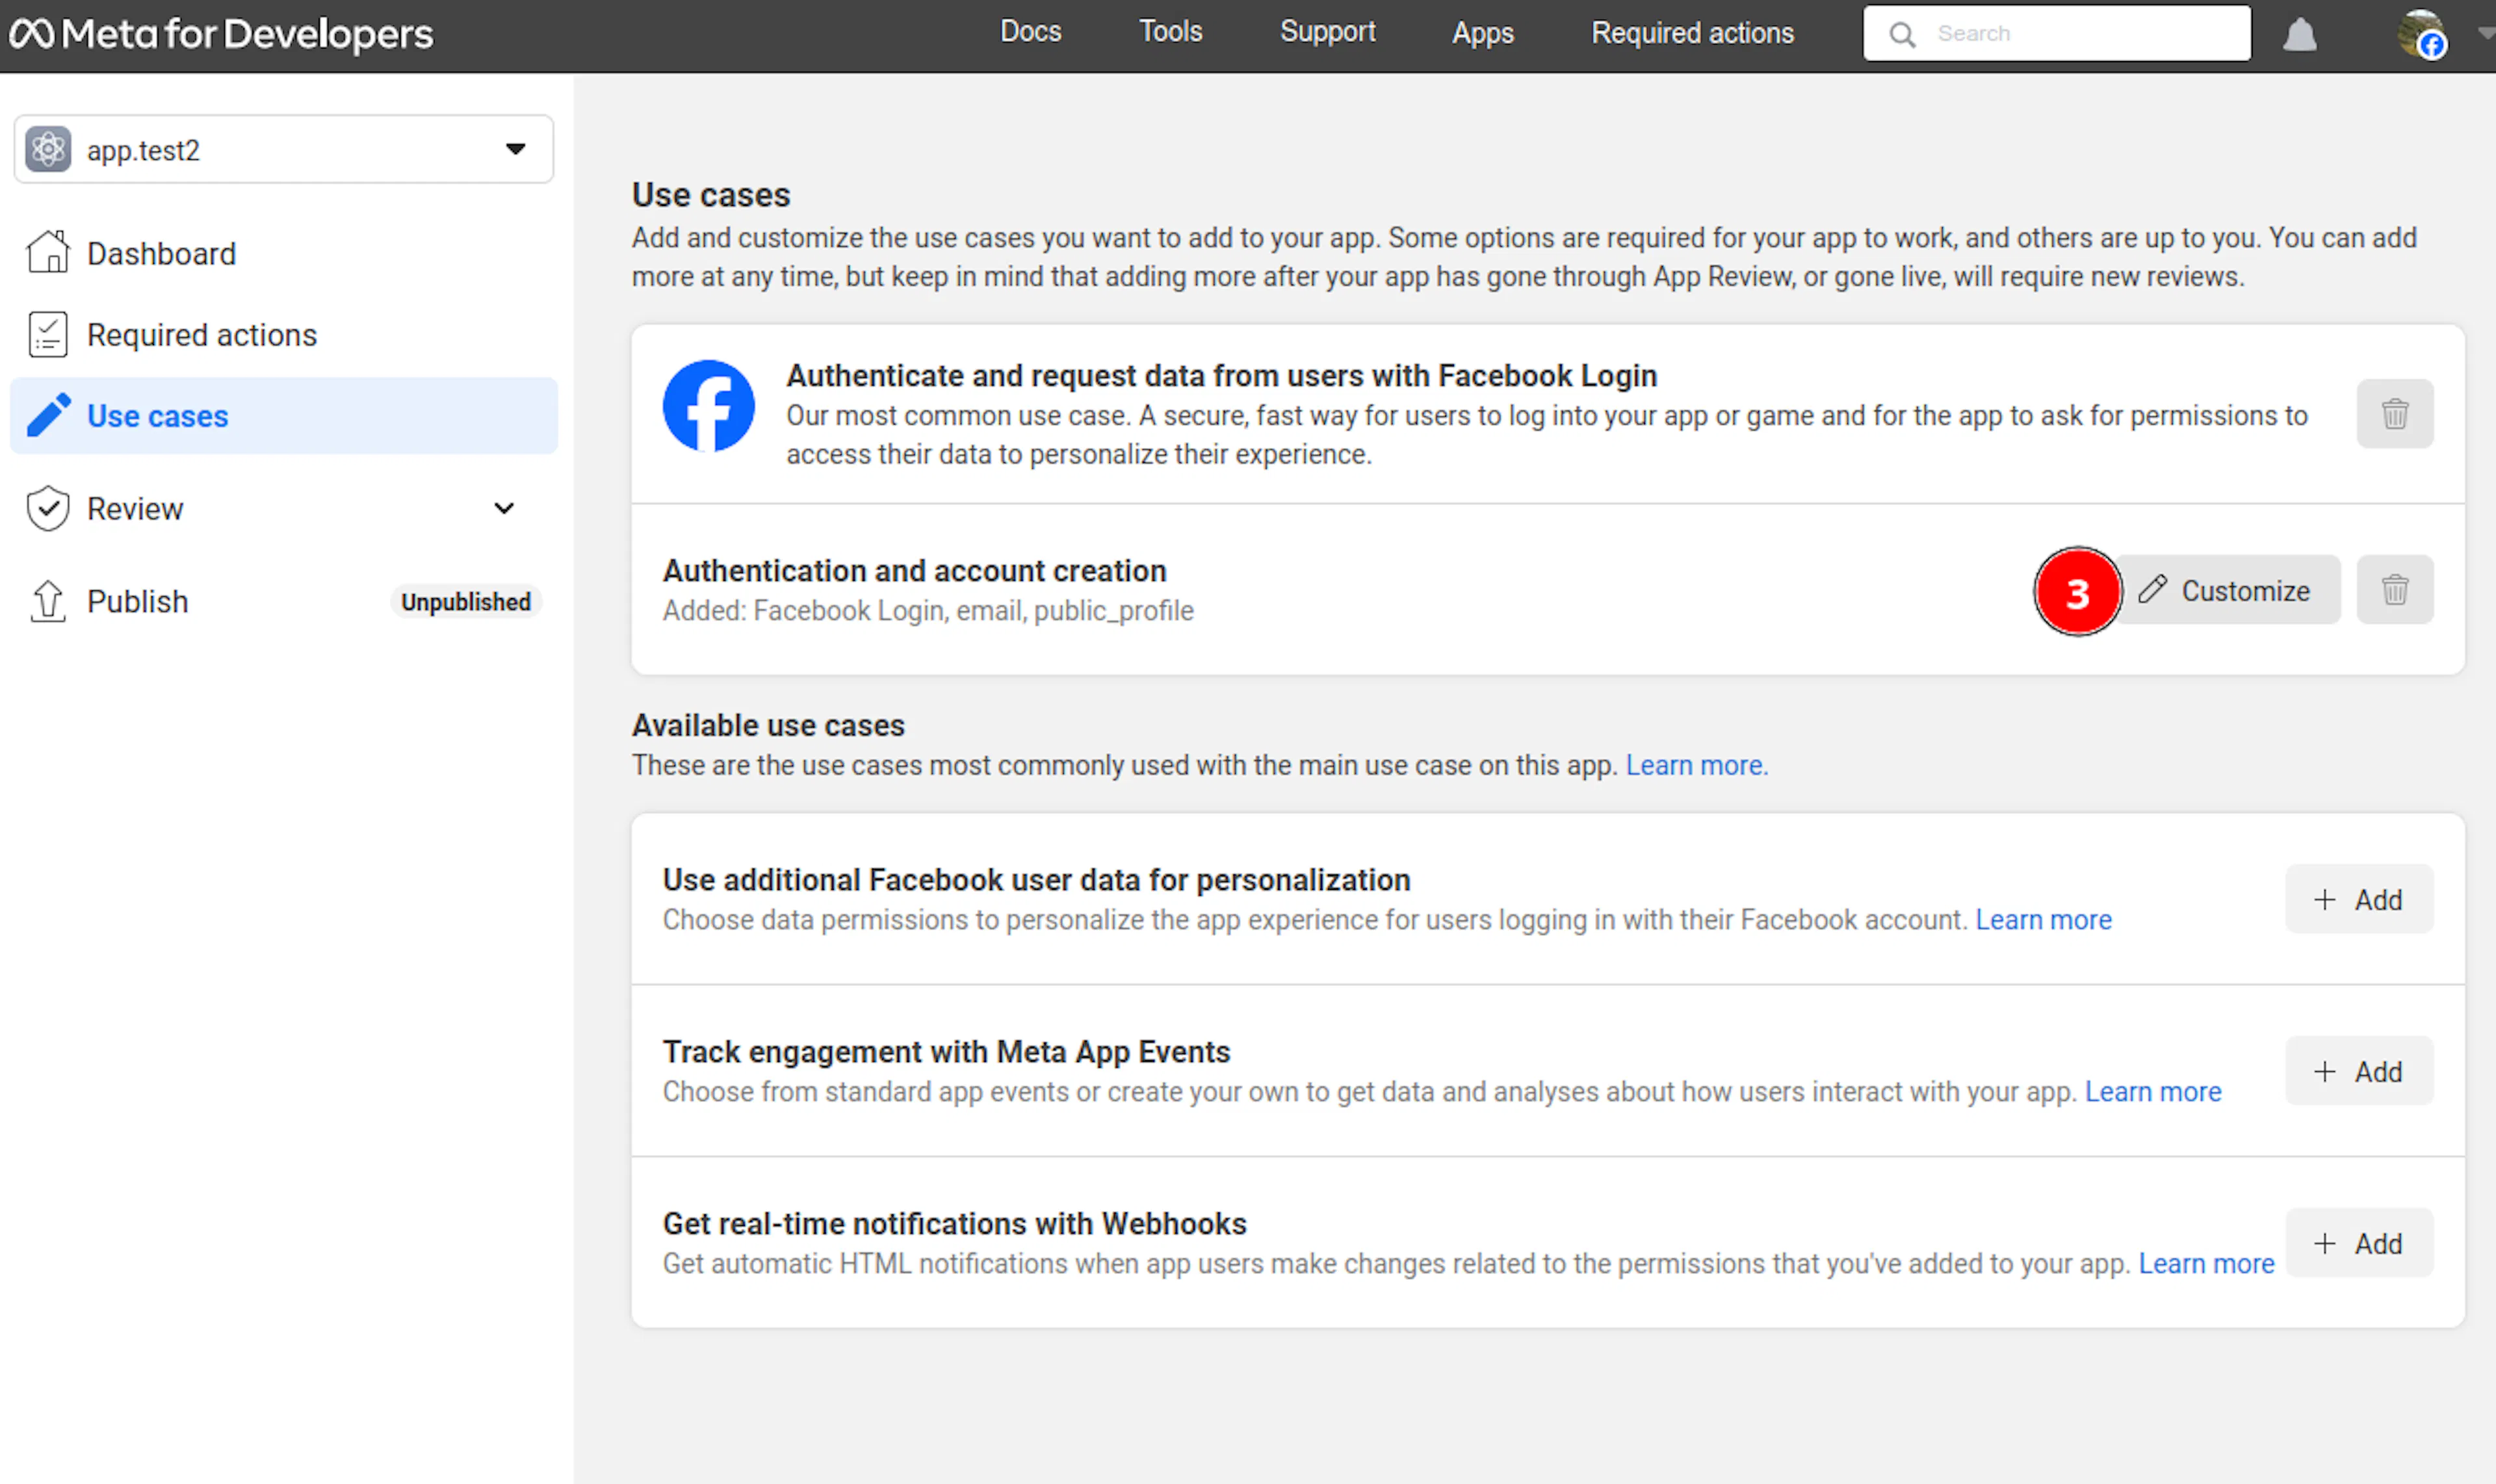
Facebook Login — Customize button -
Click Settings.
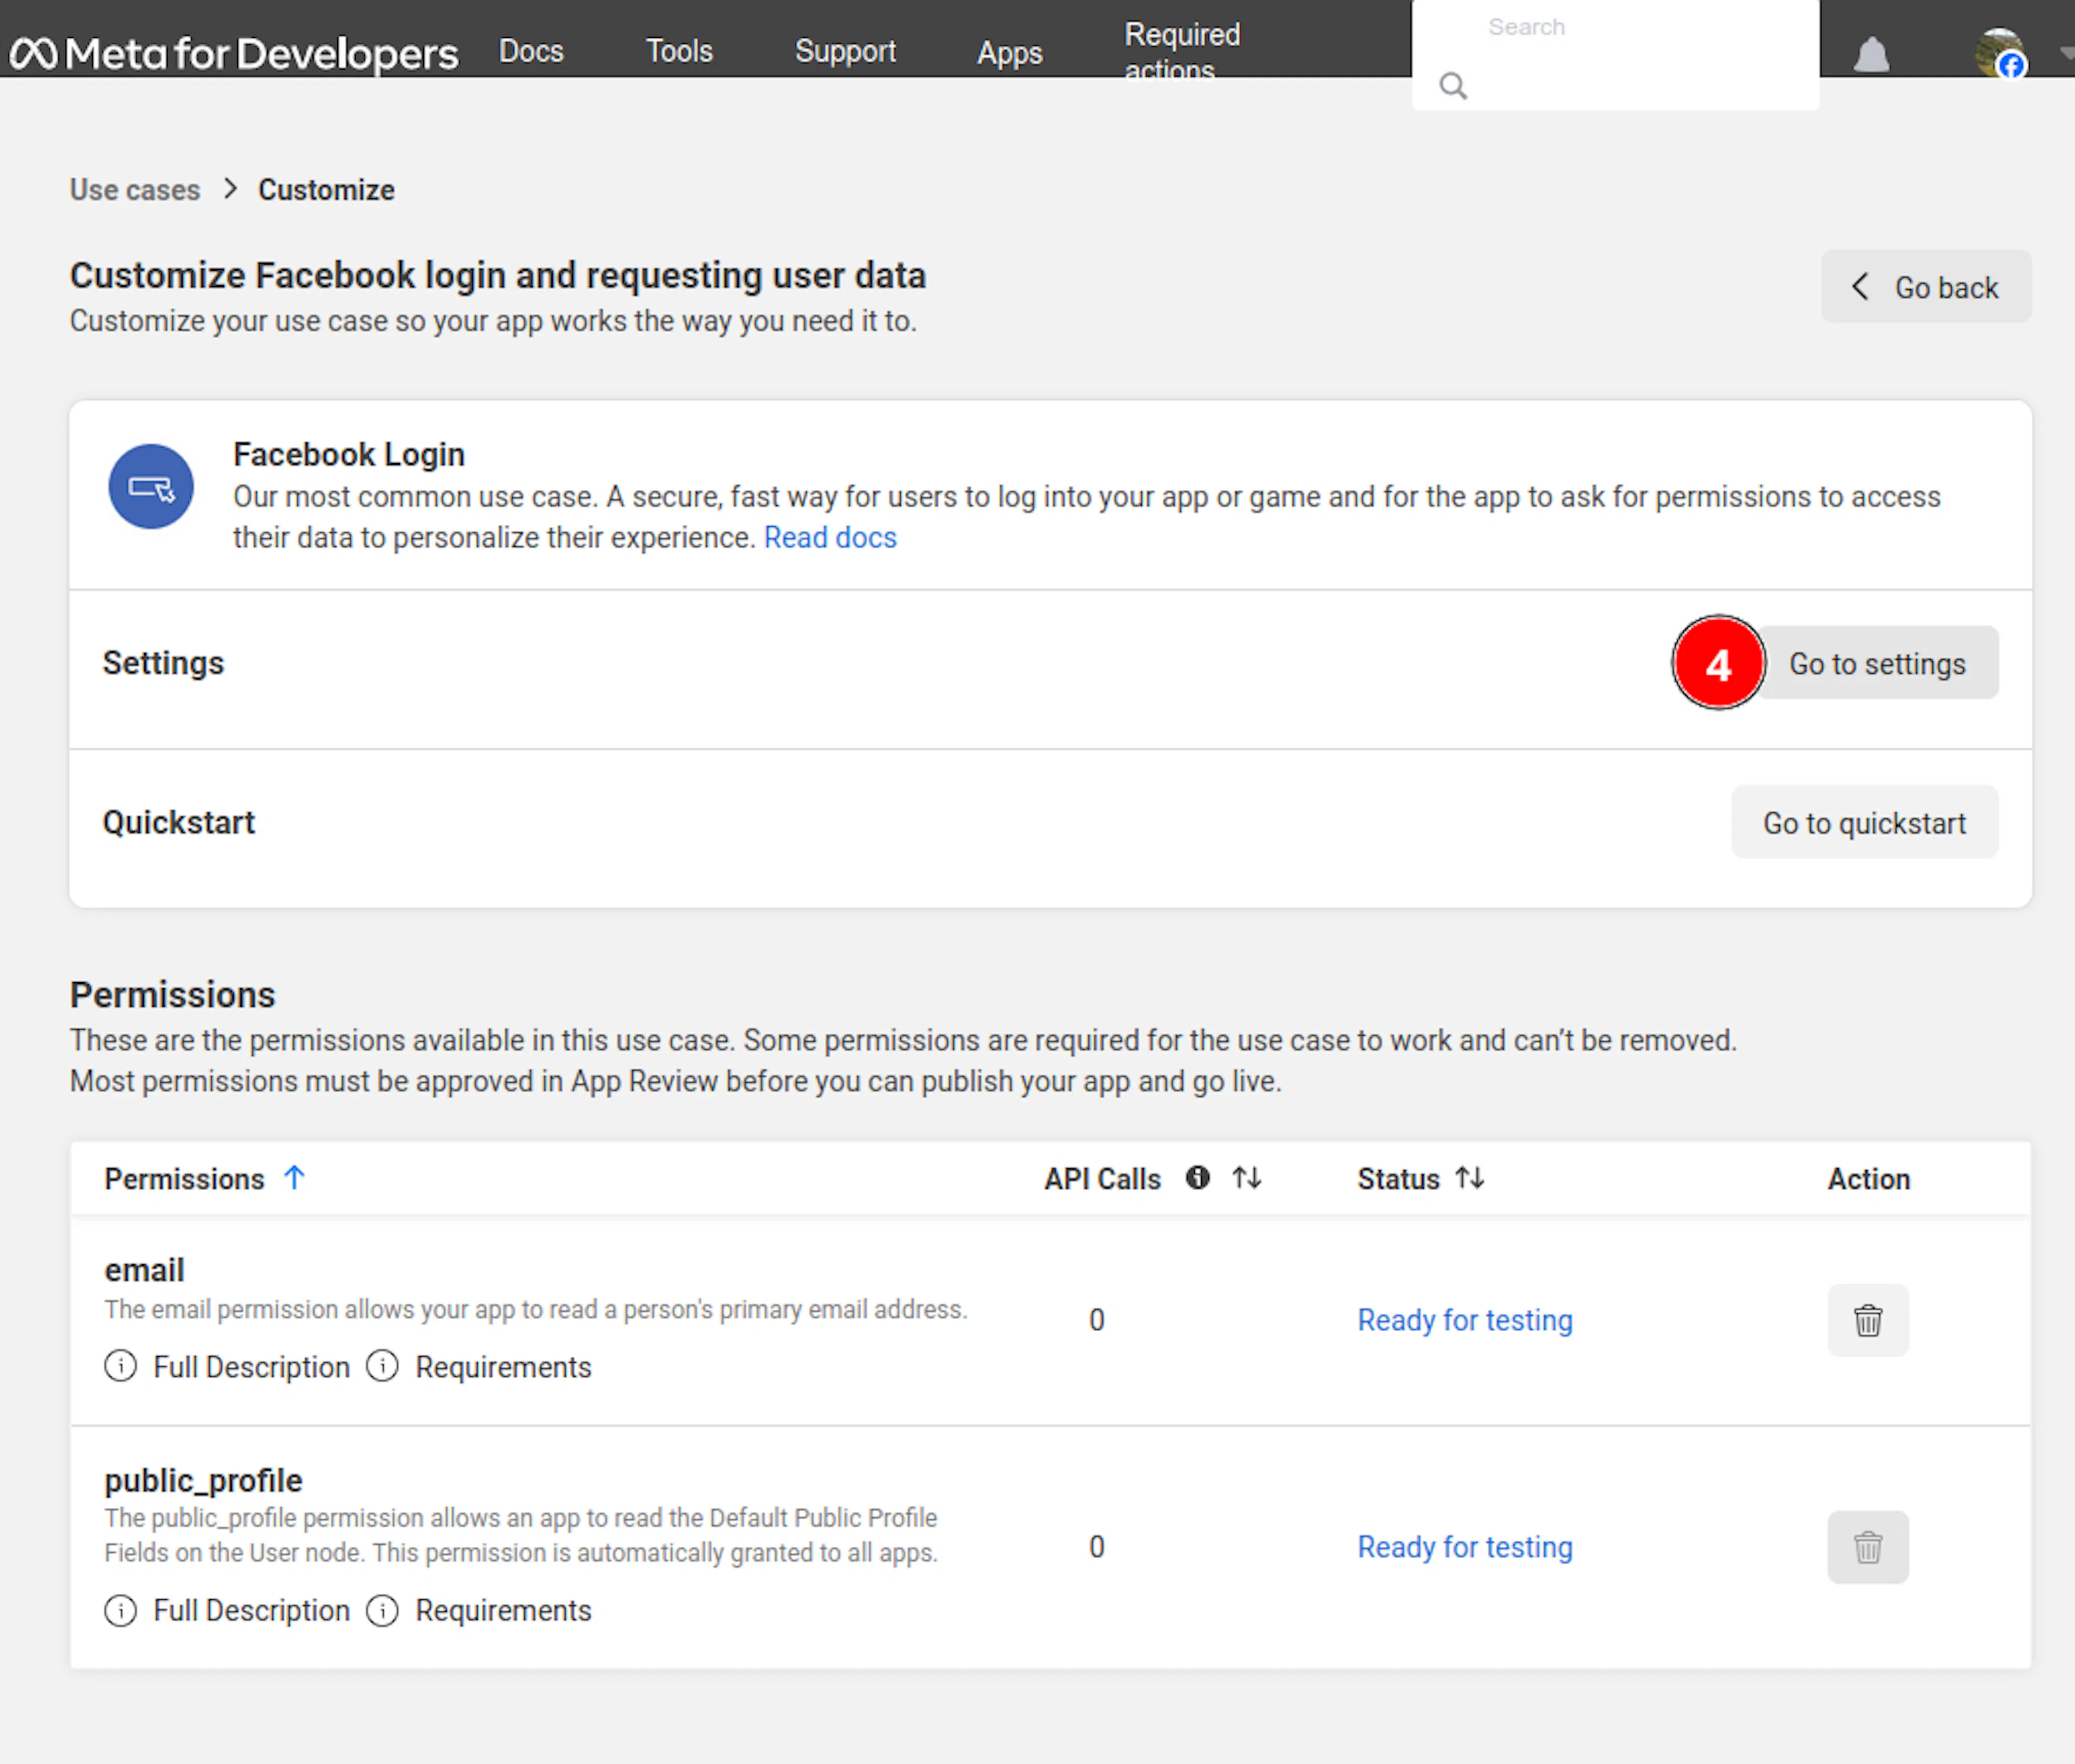
Facebook Login — Settings page -
Under Client OAuth settings:
- Enable Client OAuth login and Web OAuth login if not already enabled.
- Add the redirect URL provided by N2I to Valid OAuth Redirect URIs. Do not remove any existing URIs.
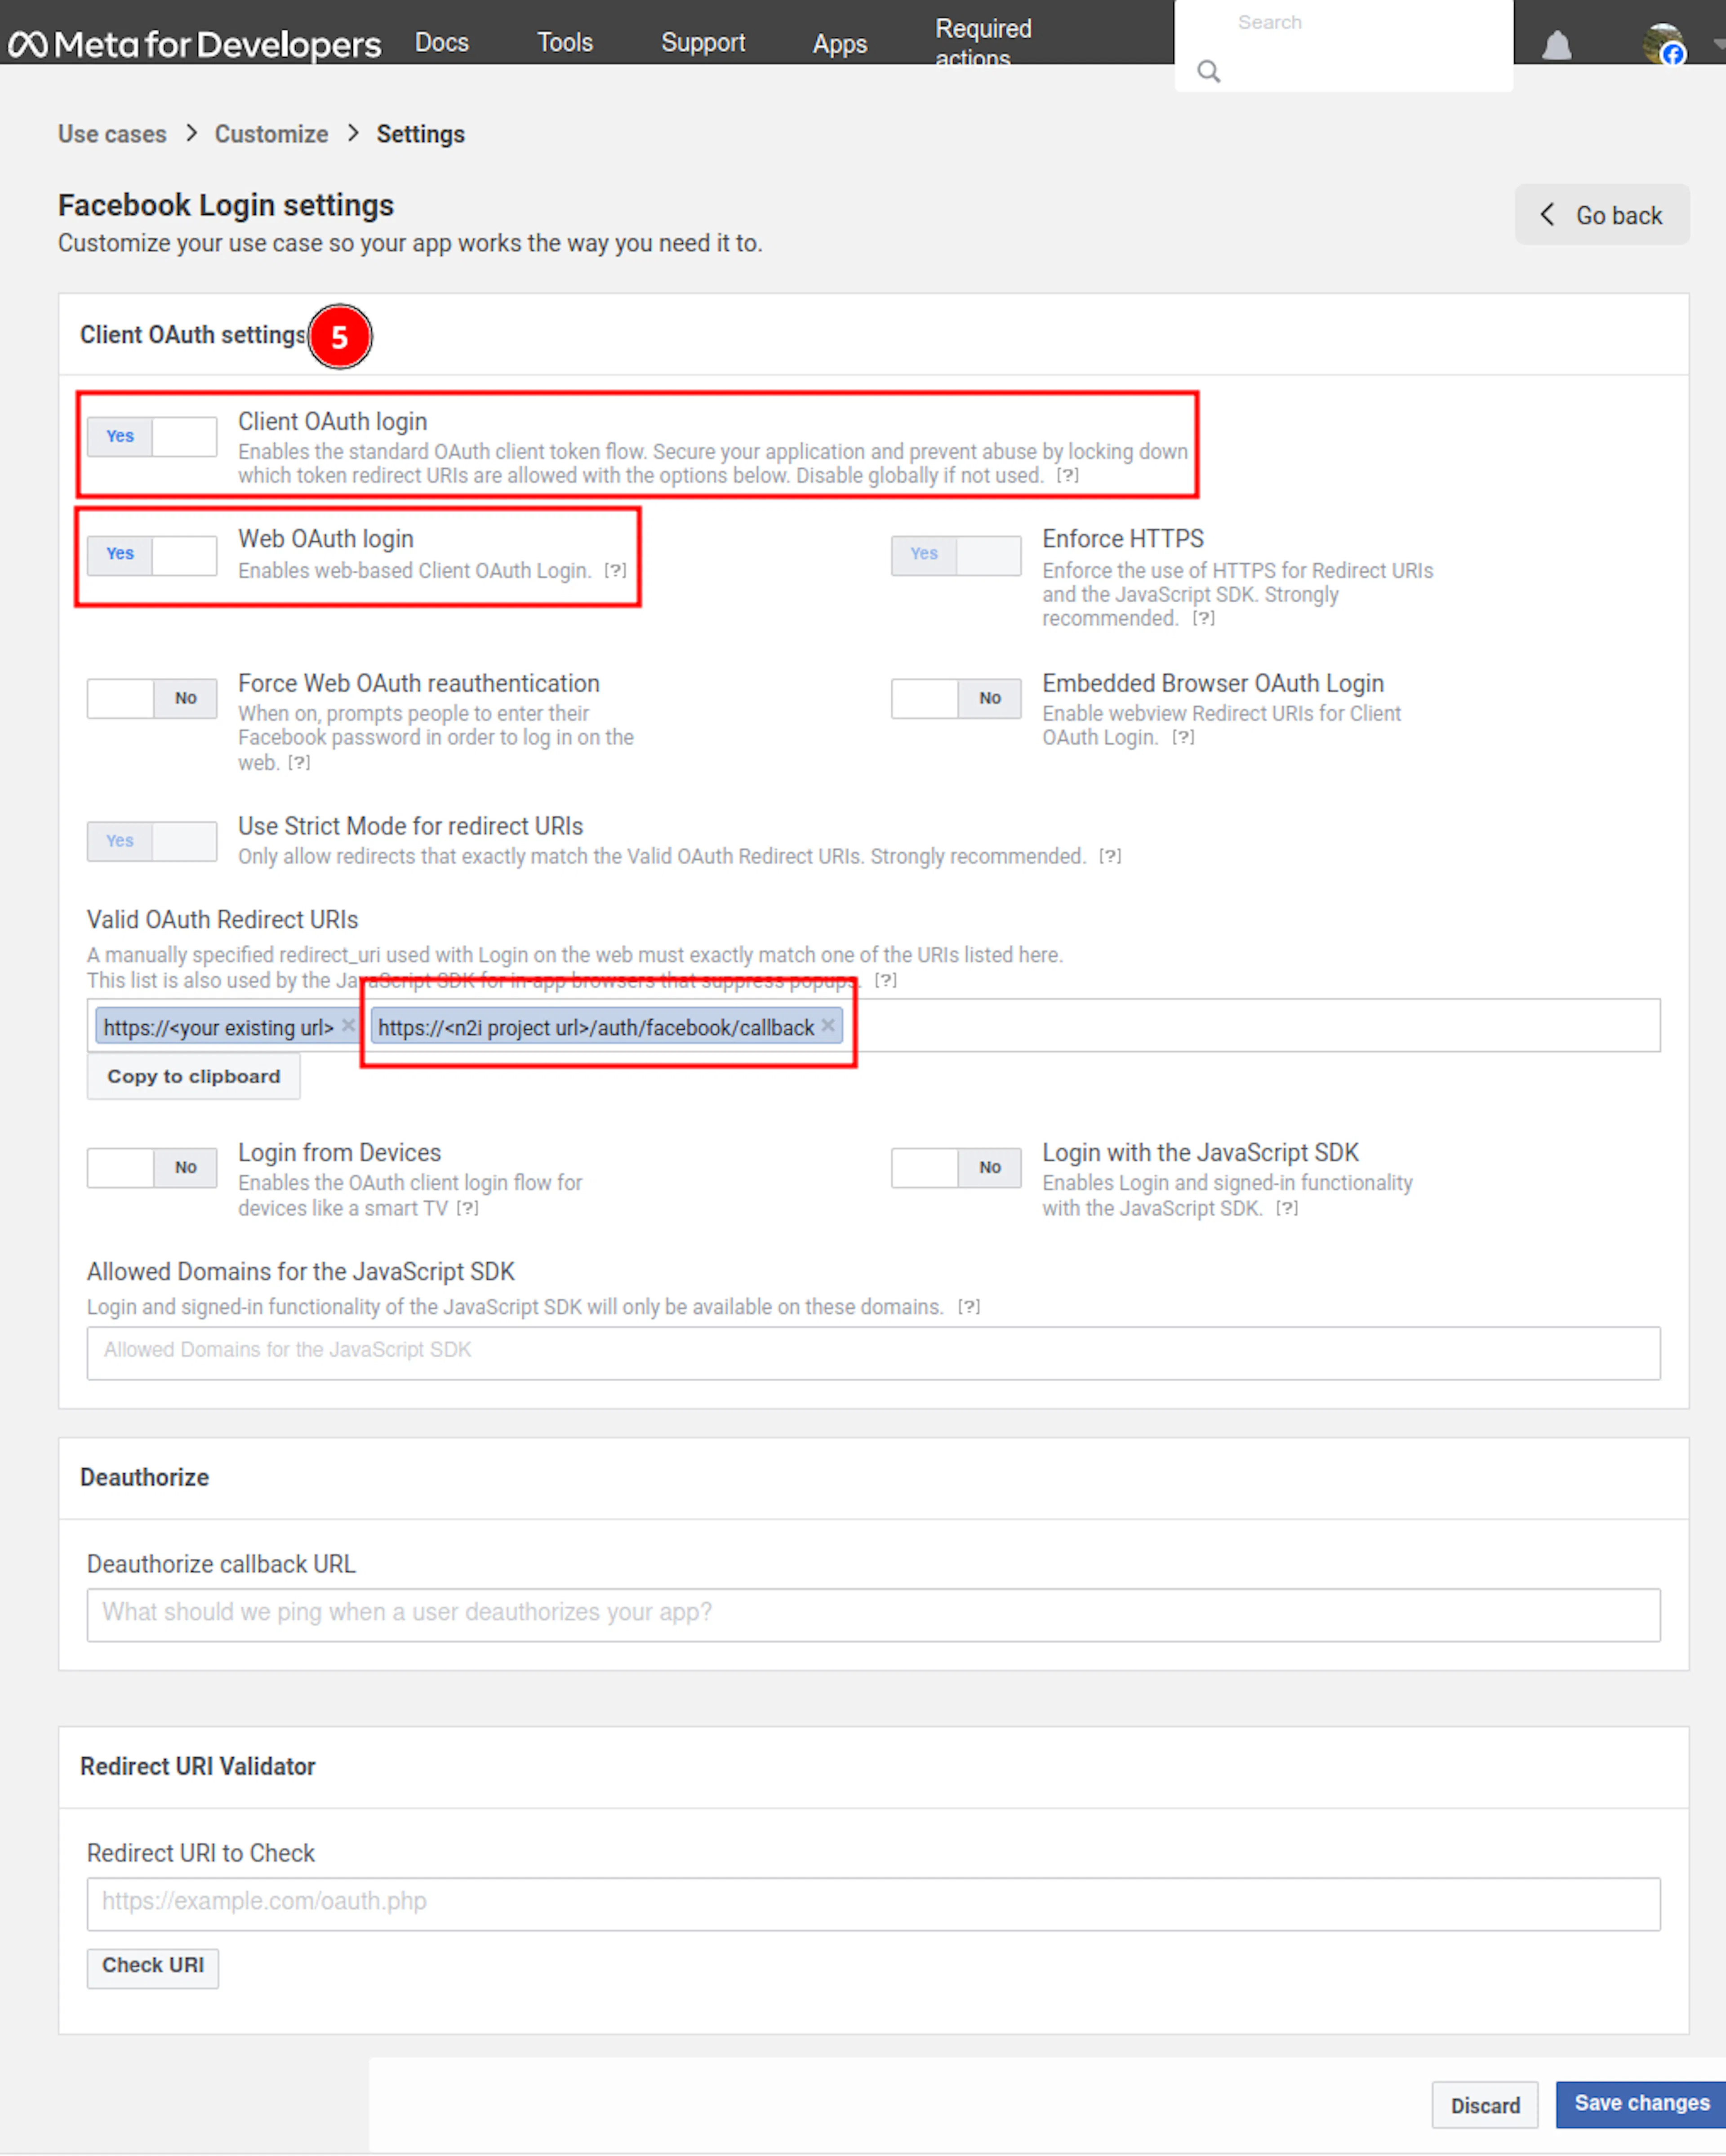
Client OAuth settings — adding the N2I redirect URI -
Click Save.
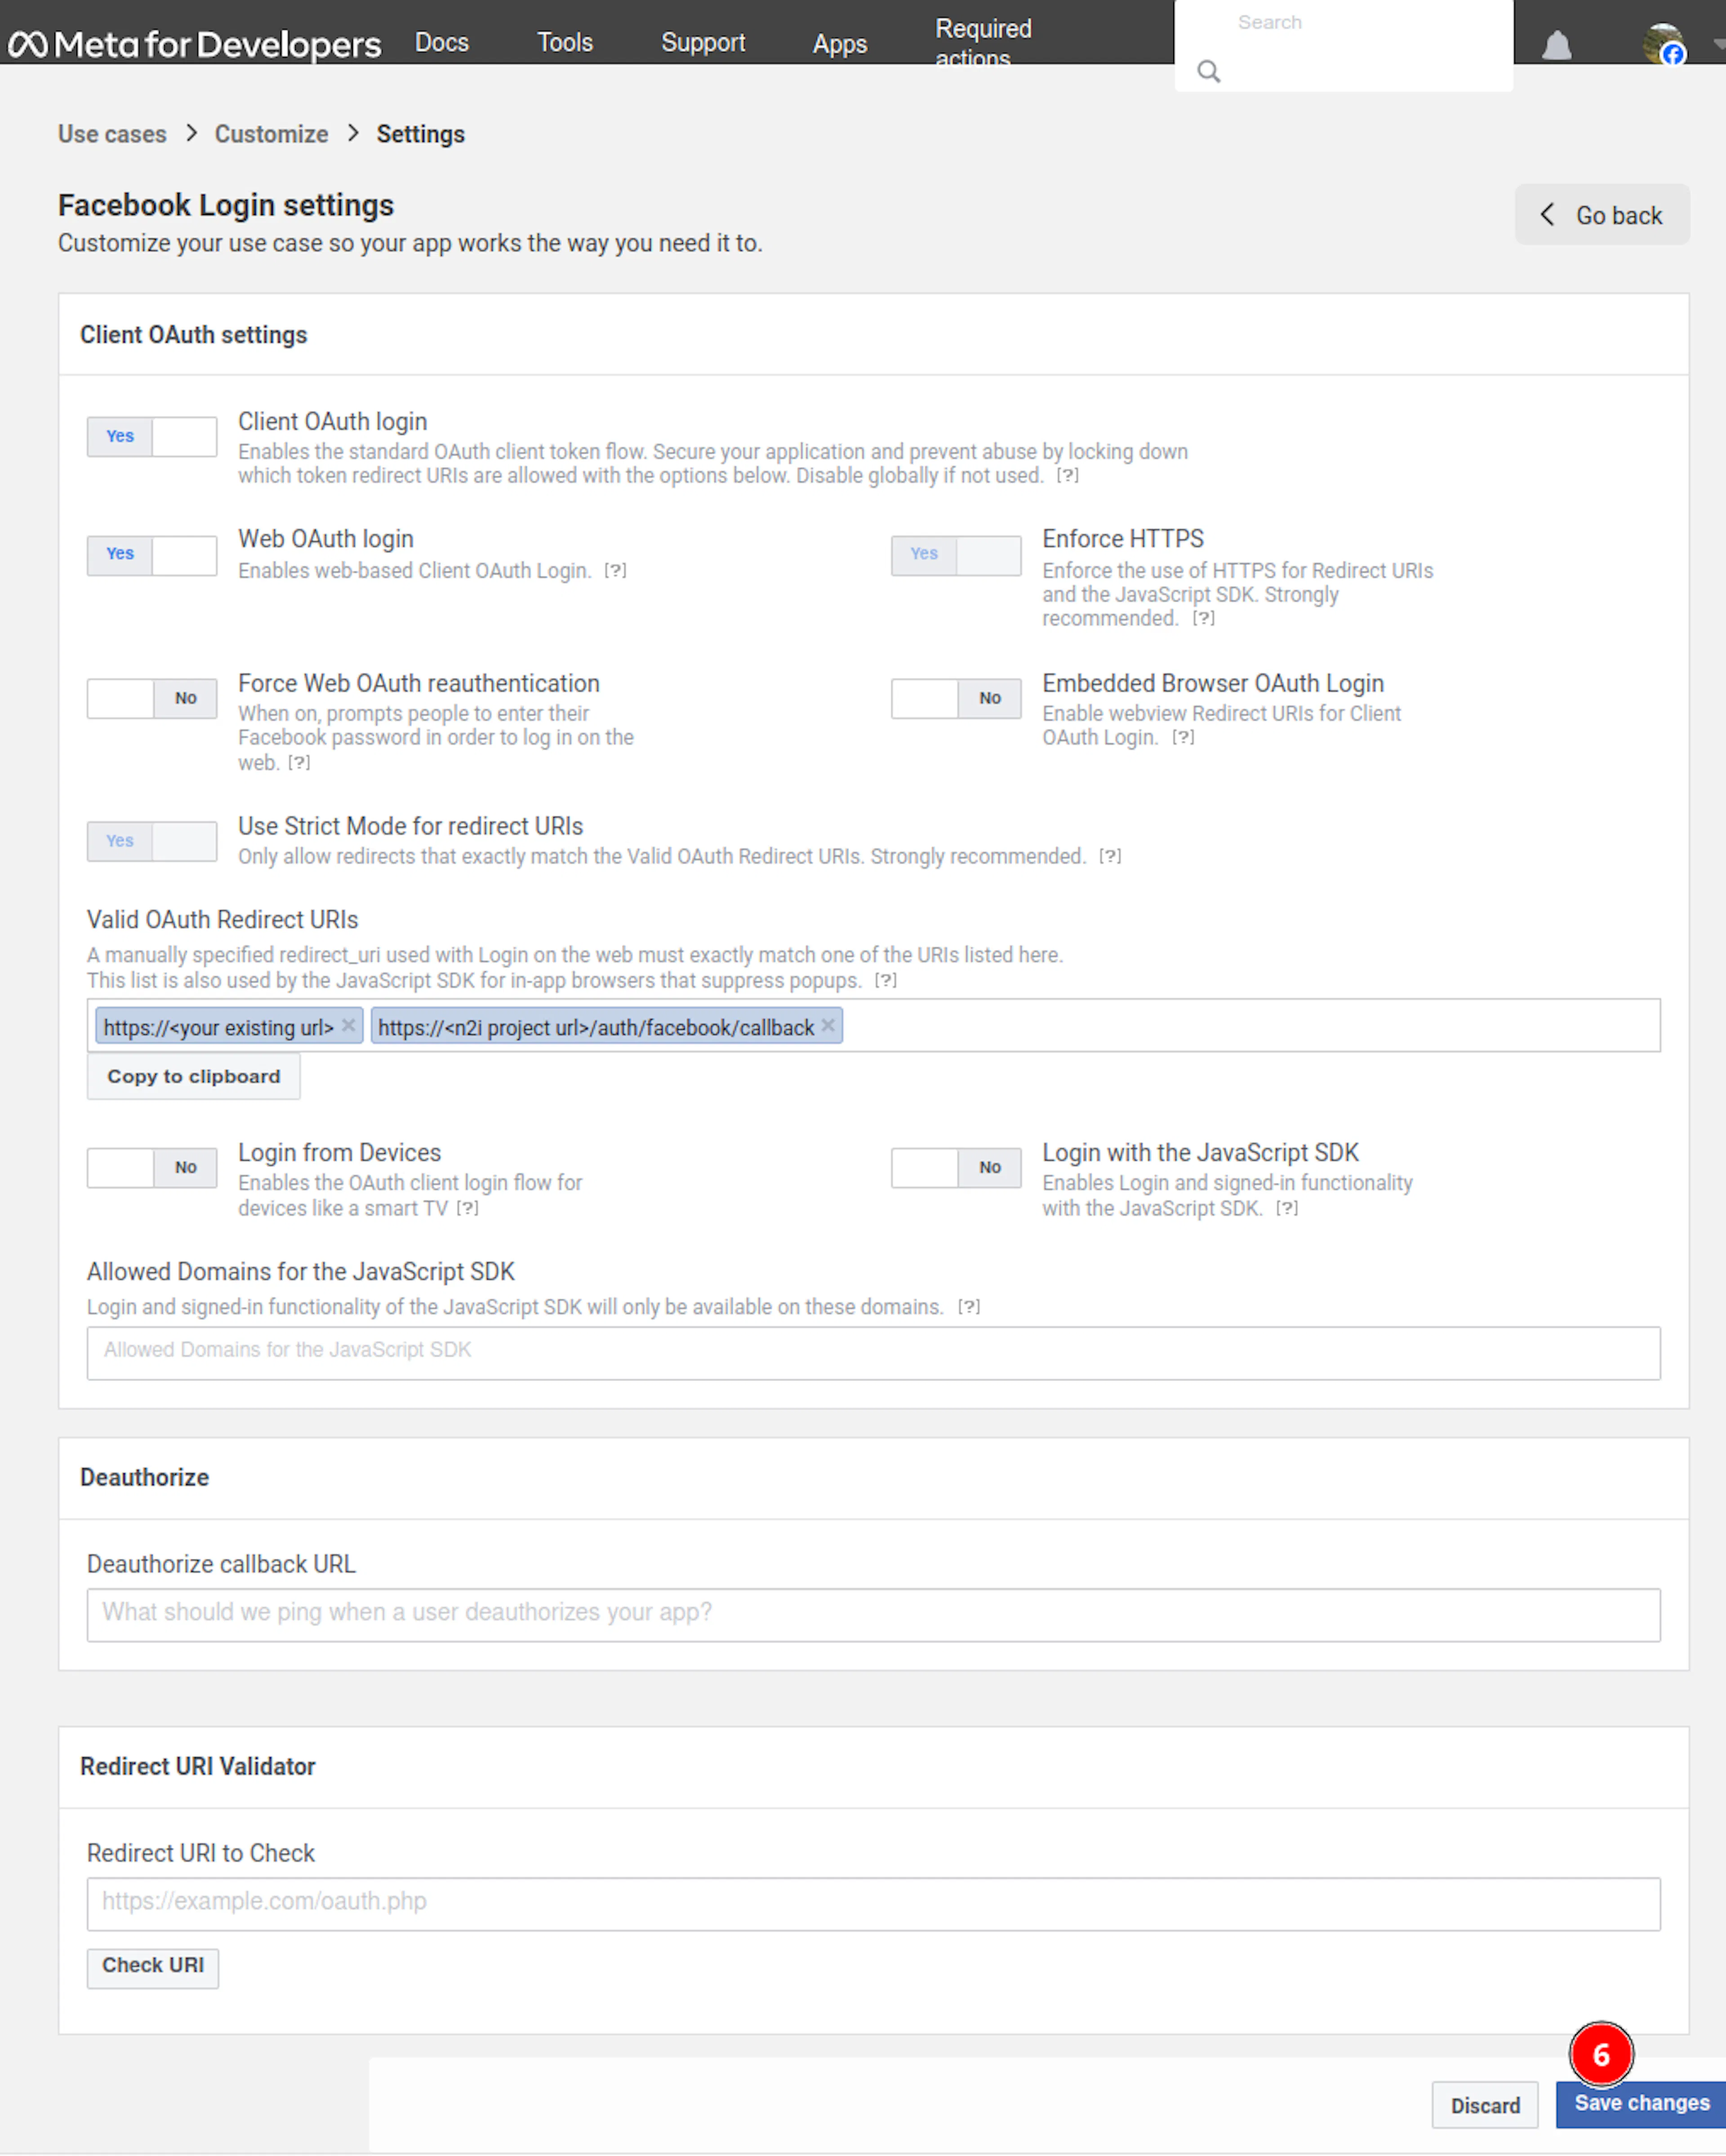
Save changes button
Once saved, notify N2I so the feature can be activated for your project.